Editor’s Note: OnAllBands is pleased to post a series of articles written by accomplished amateur radio contester and DX Engineering customer/technical support specialist Kirk Pickering, K4RO. The articles, originally published in the National Contest Journal from 2008-11 and updated with current information, offer valuable insights for both contesters new and old.
***
I’ve been off the air again lately, this time due to a lightning strike. The last few months have been all about troubleshooting and rebuilding the station for the next wave of contests. Some of the work got me to thinking about the importance of basic technical skills to the successful contester.
Who You Gonna Call?
The technical skill set of amateurs has certainly changed over time, and the contesting sub-hobby is no different. Today’s contester probably spends more time solving computer-related problems than he or she does repairing radios, amplifiers, and antennas.
Computer care and maintenance for the contest station is probably a large enough topic for a separate article. However, the need for some basic fundamental technical skills has not gone away. This is particularly true for the traveling contester, who may not have any option but to perform field repairs himself when something goes wrong. We’re not talking about designing your own transceiver now, but about basic troubleshooting and technical skills which are valuable to contesters at every level of the game.
Learning “which end of the soldering iron to grab” is time well spent. Not only will you be able to make your own repairs when necessary, it can also save you a lot of money. Even if you prefer to use “plug and play” components in your station, you can save a bundle (pun intended) by making your own cables.
Most importantly, you will have a better chance of recovering if something breaks down during a contest.
The Bench
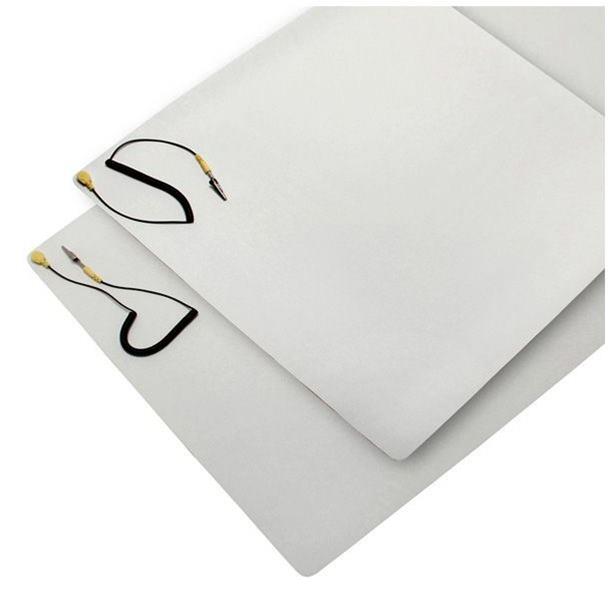
Start off right by building a workbench where you can store and manage tools, parts, and test equipment. Don’t make the mistake that I did for years—working on the floor. I used to just grab whatever was broken, place it on the floor, and start tearing into the project. Before long, I had parts and tools scattered all over the place, and it was also very painful on the lower back. Buy or build a table dedicated to electronics work. It doesn’t have to be anything fancy. I use a standard 6′ x 3′ office table. I’ve covered a section of it with an anti-static mat. Some kind of anti-static mat is a requirement these days, as many components have devices which are sensitive to static discharge.

Convenient access to electrical power is also a must for powering test equipment and other devices. Don’t forget a good bright light overhead. A magnifying lamp is also very helpful. I need a bright light and magnifier more every year, as my eyesight continues to deteriorate with age.

Another item to consider is storage for parts and cables. The small multi-drawer parts bins are handy for small components, and I like hooks on the wall for cable management.
Some space for test equipment documentation and other manuals is also necessary. Consider an L-shaped arrangement, with one space for test equipment and gear, and the other for schematic diagrams and other documentation. All areas must be well lit. Many test benches today include a computer and monitor arrangement for looking up parts and zooming in on schematic diagrams.


The Soldering Station
Those of us who started ham radio during the Heathkit era have a leg up on today’s amateur when it comes to soldering skills. My first radios were an HW-7, then an HW-101, both of which I built as a young teenager. I made hundreds of poor solder connections using a brass wood burner as a soldering iron. It was amazing that the equipment worked at all.
Years later, I met people who were technicians by trade, and they showed me the right way to solder and work with electronics equipment. Try to find someone who can show you the basics of soldering, and who can help you learn the right way to solder. There are some soldering tutorial videos on the internet which can also be helpful. I recommend investing in a decent temperature-controlled soldering station, as opposed to a Weller “gun” type or simple pencil iron. The right size tip and proper amount of heat make a lot of difference in successful soldering outcomes.

Get a few different sizes of solder and spend some practice time soldering different sizes of wire and components. Soldering is not rocket science, but it does require some practice to do properly. Soldering is a fundamental skill which is used in many parts of station construction. Once you have the basics down, I recommend trying to build a simple kit.
While Heathkit is no longer with us, there are still many useful ham shack accessories available in kit form. While there are many new alternatives to soldering available now to the ham, the astute contester will learn how to make his own high-quality soldered connections. I understand that there are top contesters who have hand-soldered every connector in their stations. That’s a LOT of connectors, and a lot of work. They must understand the importance of soldering hundreds of PL-259s correctly, every time. The old adage, “if you want something done right, do it yourself” also applies here.

Test Equipment
If you have testing equipment such as a multimeter, it’s worth spending some time to read the manual that came with it and learn how to use every available function properly. Learn the difference between how to connect a voltmeter versus an ammeter. Study and develop a basic understanding of the differences in AC and DC behavior.
Other test equipment useful to the contester includes an RF signal generator, a function generator, and an oscilloscope. Armed with these tools, it is possible to perform a lot of basic troubleshooting on a large variety of equipment.

Be cautious when buying used test equipment. While there are some good deals to be had, you want to be sure that the unit is operating within its published specifications and includes all necessary probes.
No ham shack bench would be complete without some type of antenna analyzer such as those available from RigExpert and Comet.


Vector network analyzers (VNAs) are available to the serious antenna enthusiast in a range of frequency range capabilities.

Troubleshooting Techniques
The simplest (and most common) of any test done while troubleshooting is the continuity check. Knowing how to test continuity can solve myriad problems and is often the only test needed to make a complete diagnosis. Signal tracing is probably the second most important. A continuity check is actually a type of signal tracing, in its most elemental form (apply current at one point and see if it reaches the other side). Signal tracing is where we inject a known value of AF or RF energy into a circuit and check various points along the circuit to see if the various stages are behaving the way they are supposed to. An AF or RF signal generator or function generator is used as the source, and an oscilloscope is generally used to trace the signal through the circuit.
I would be remiss not to mention a troubleshooting technique that has worked more than once for me. I have “repaired” broken radios using the following procedure. After removing the covers and inspecting the chassis carefully, I gently loosen and then re-tighten every screw which holds a circuit board to the chassis. There can be several dozen or even hundreds of screws in a modern transceiver. After checking and tightening every chassis screw, the next step is to remove and re-seat every inter-connecting cable inside the radio.
Again, there can be dozens of these in a modern transceiver, and some of the connectors are small and rather fragile. Use good lighting and proceed slowly and carefully. The idea behind this “fix” is to break through any oxidation barriers that have developed between connector pins and/or circuit board paths to the chassis ground. You might be surprised how often this fixes a problem.
The Little Things
Over the years, I have found several little items which make life at the workbench easier. I remember the day that a technician friend first showed me how to use shrink wrap tubing. I have since become a big fan of this material. Now my cables have a professional finished look, and I no longer have sticky globs of electrical tape at every junction. Be sure to get a couple of sets of clip leads—they are very handy, and no workbench is complete without them. A prototyping board is very useful for spinning up a quick test project. (My biggest problem is getting a finished project off of the prototyping board and into a decent chassis and enclosure.)
A label maker is very handy for labeling cables, parts drawers, and homebrew equipment panels. Take the time to learn how to properly solder PL-259 cables. It takes some practice, but with the right tools it can be done right. There are also crimp-style PL-259 connectors and DX Engineering’s crimp/solder variety.


Another thing every workbench needs is a collection of various types of connectors and adapters. Just when I think I have every possible combination that I could need, I wind up needing some other type of adapter. A good collection of phone, “RCA,” and RF connectors of both genders is a nice place to start.
Documentation
I could probably write an entire article on station documentation, but that will have to wait for another time. I do want to mention the importance of documenting your troubleshooting adventures. It is best to write things down shortly after they happen, before that “secret technique” discovered in the heat of the moment gets lost to the memory bit bucket. I like to keep a log of all repair projects. It helps me a lot when a problem recurs but also helps me to share my discoveries with other hams who may have encountered the same problem. I have received LOTS of help from other hams in keeping my station running. So please document your work—you never know when you might be able to help out a fellow contester. I repaired an Alpha 87A amplifier by replacing the transmit PIN diodes. Every step was documented and shared publicly. The resulting document has helped several others repair their amplifiers.
Learning Resources
The ARRL bookshelf is full of articles regarding technical troubleshooting. The “Hints and Kinks” series of articles from “QST” are very useful. For a deeper look into the theory and practical application of electronics, I recommend the “Hands On Radio” series by Ward, N0AX. Ward does an excellent job of taking us through a variety of circuit types.


Probably the best resource that I can recommend is to find a technician in your area who is willing to help show you the ropes. There is no substitute for learning from a skilled technician. YouTube videos are a good alternative for those with no one locally available.
That’s all for this installment. See you on the bands, and don’t forget to submit your log to the sponsor, no matter how many QSOs you made. It helps you, helps the sponsor, and helps the sport of contesting
The post Contesting 101: Building a Workbench & Basic Ham Radio Troubleshooting Techniques appeared first on OnAllBands.
OnAllBands